Sending Records to MSS
The screens shown are from an invented example firm (Example Law LLP) and invented clients. No real patient information appears.
In short: go to https://portal.mssrecords.co.uk, sign in with your work e-mail and the code we e-mail you, find your client, drag the records into the box and press SEND TO MSS. MSS does not need to set anything up for you first.
1Who can use it
- Anyone at a firm that instructs MSS, using their work e-mail address (for example jane@yourfirm.co.uk).
- No release or invitation from MSS is needed to send records.
- You only ever see your own firm's cases.
2Sign in with your e-mail
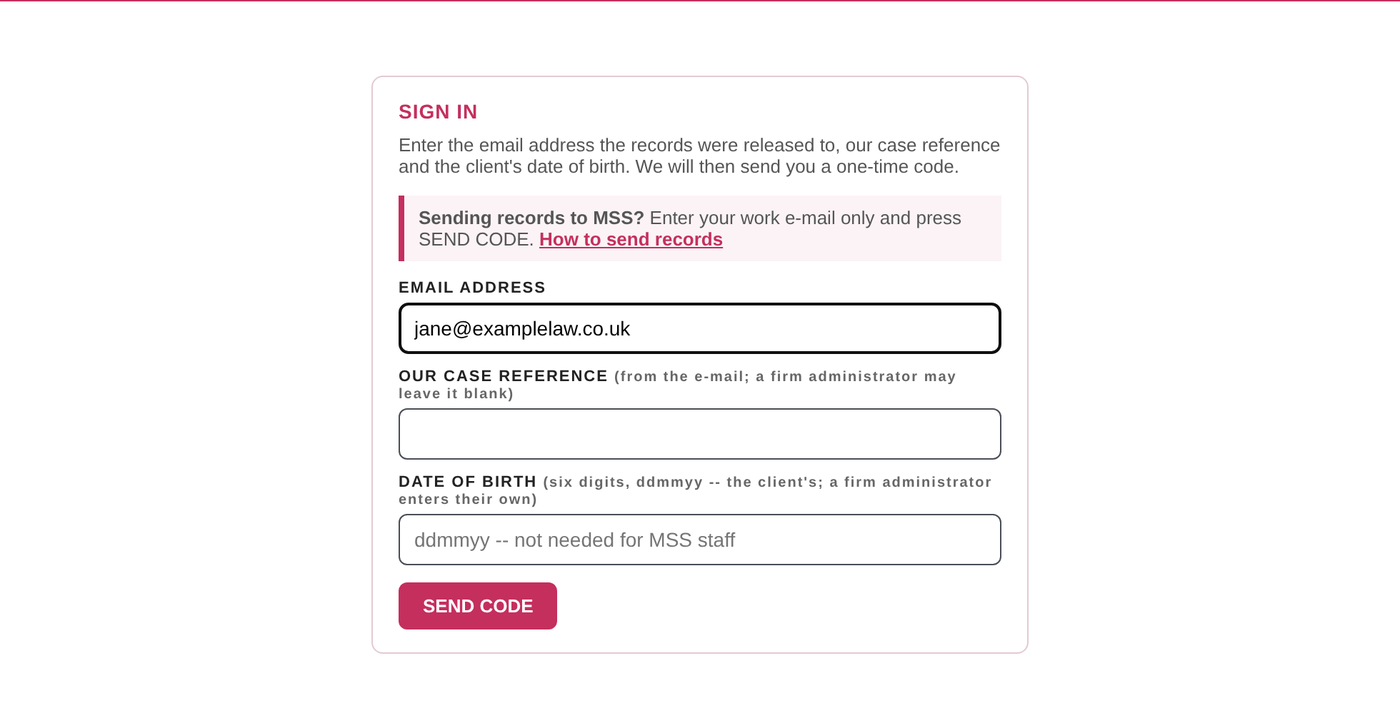
Go to https://portal.mssrecords.co.uk. Enter your work e-mail only. Leave our case reference and date of birth blank: those are only for viewing records MSS has released to you. Press SEND CODE. The sign-in box also says this, with a link to this guide.
If MSS has already released records to you, sign in as usual instead, with our case reference and the client's date of birth: SEND RECORDS is in the sidebar once you are in, for any client of your firm.
3Enter the code
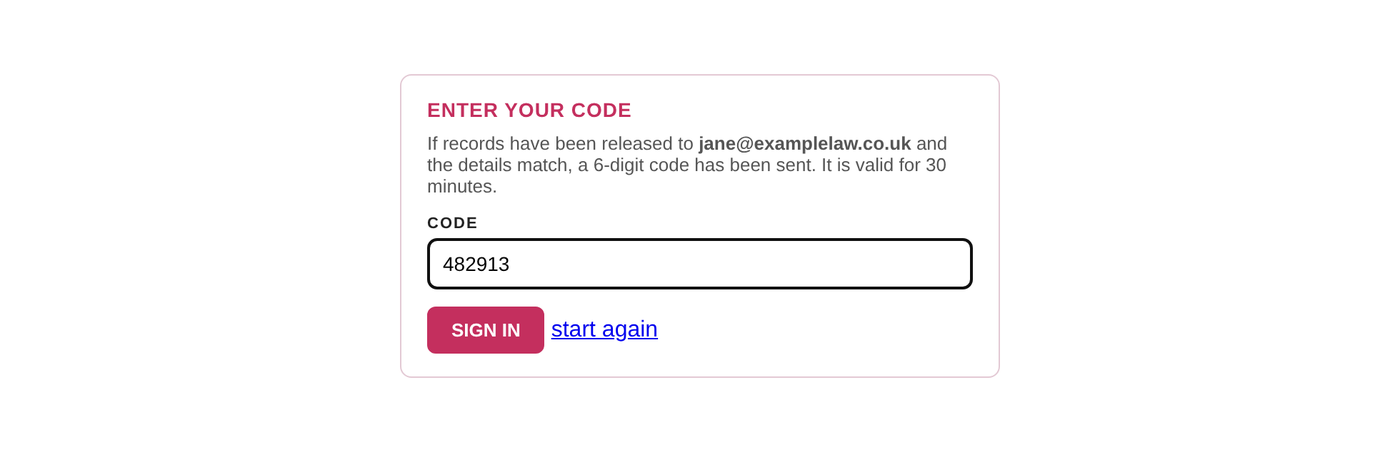
We e-mail you a 6-digit code within a minute (check junk / spam if it has not arrived). Type it in and press SIGN IN. MSS staff will never ask you for this code.
4The SEND RECORDS TO MSS page
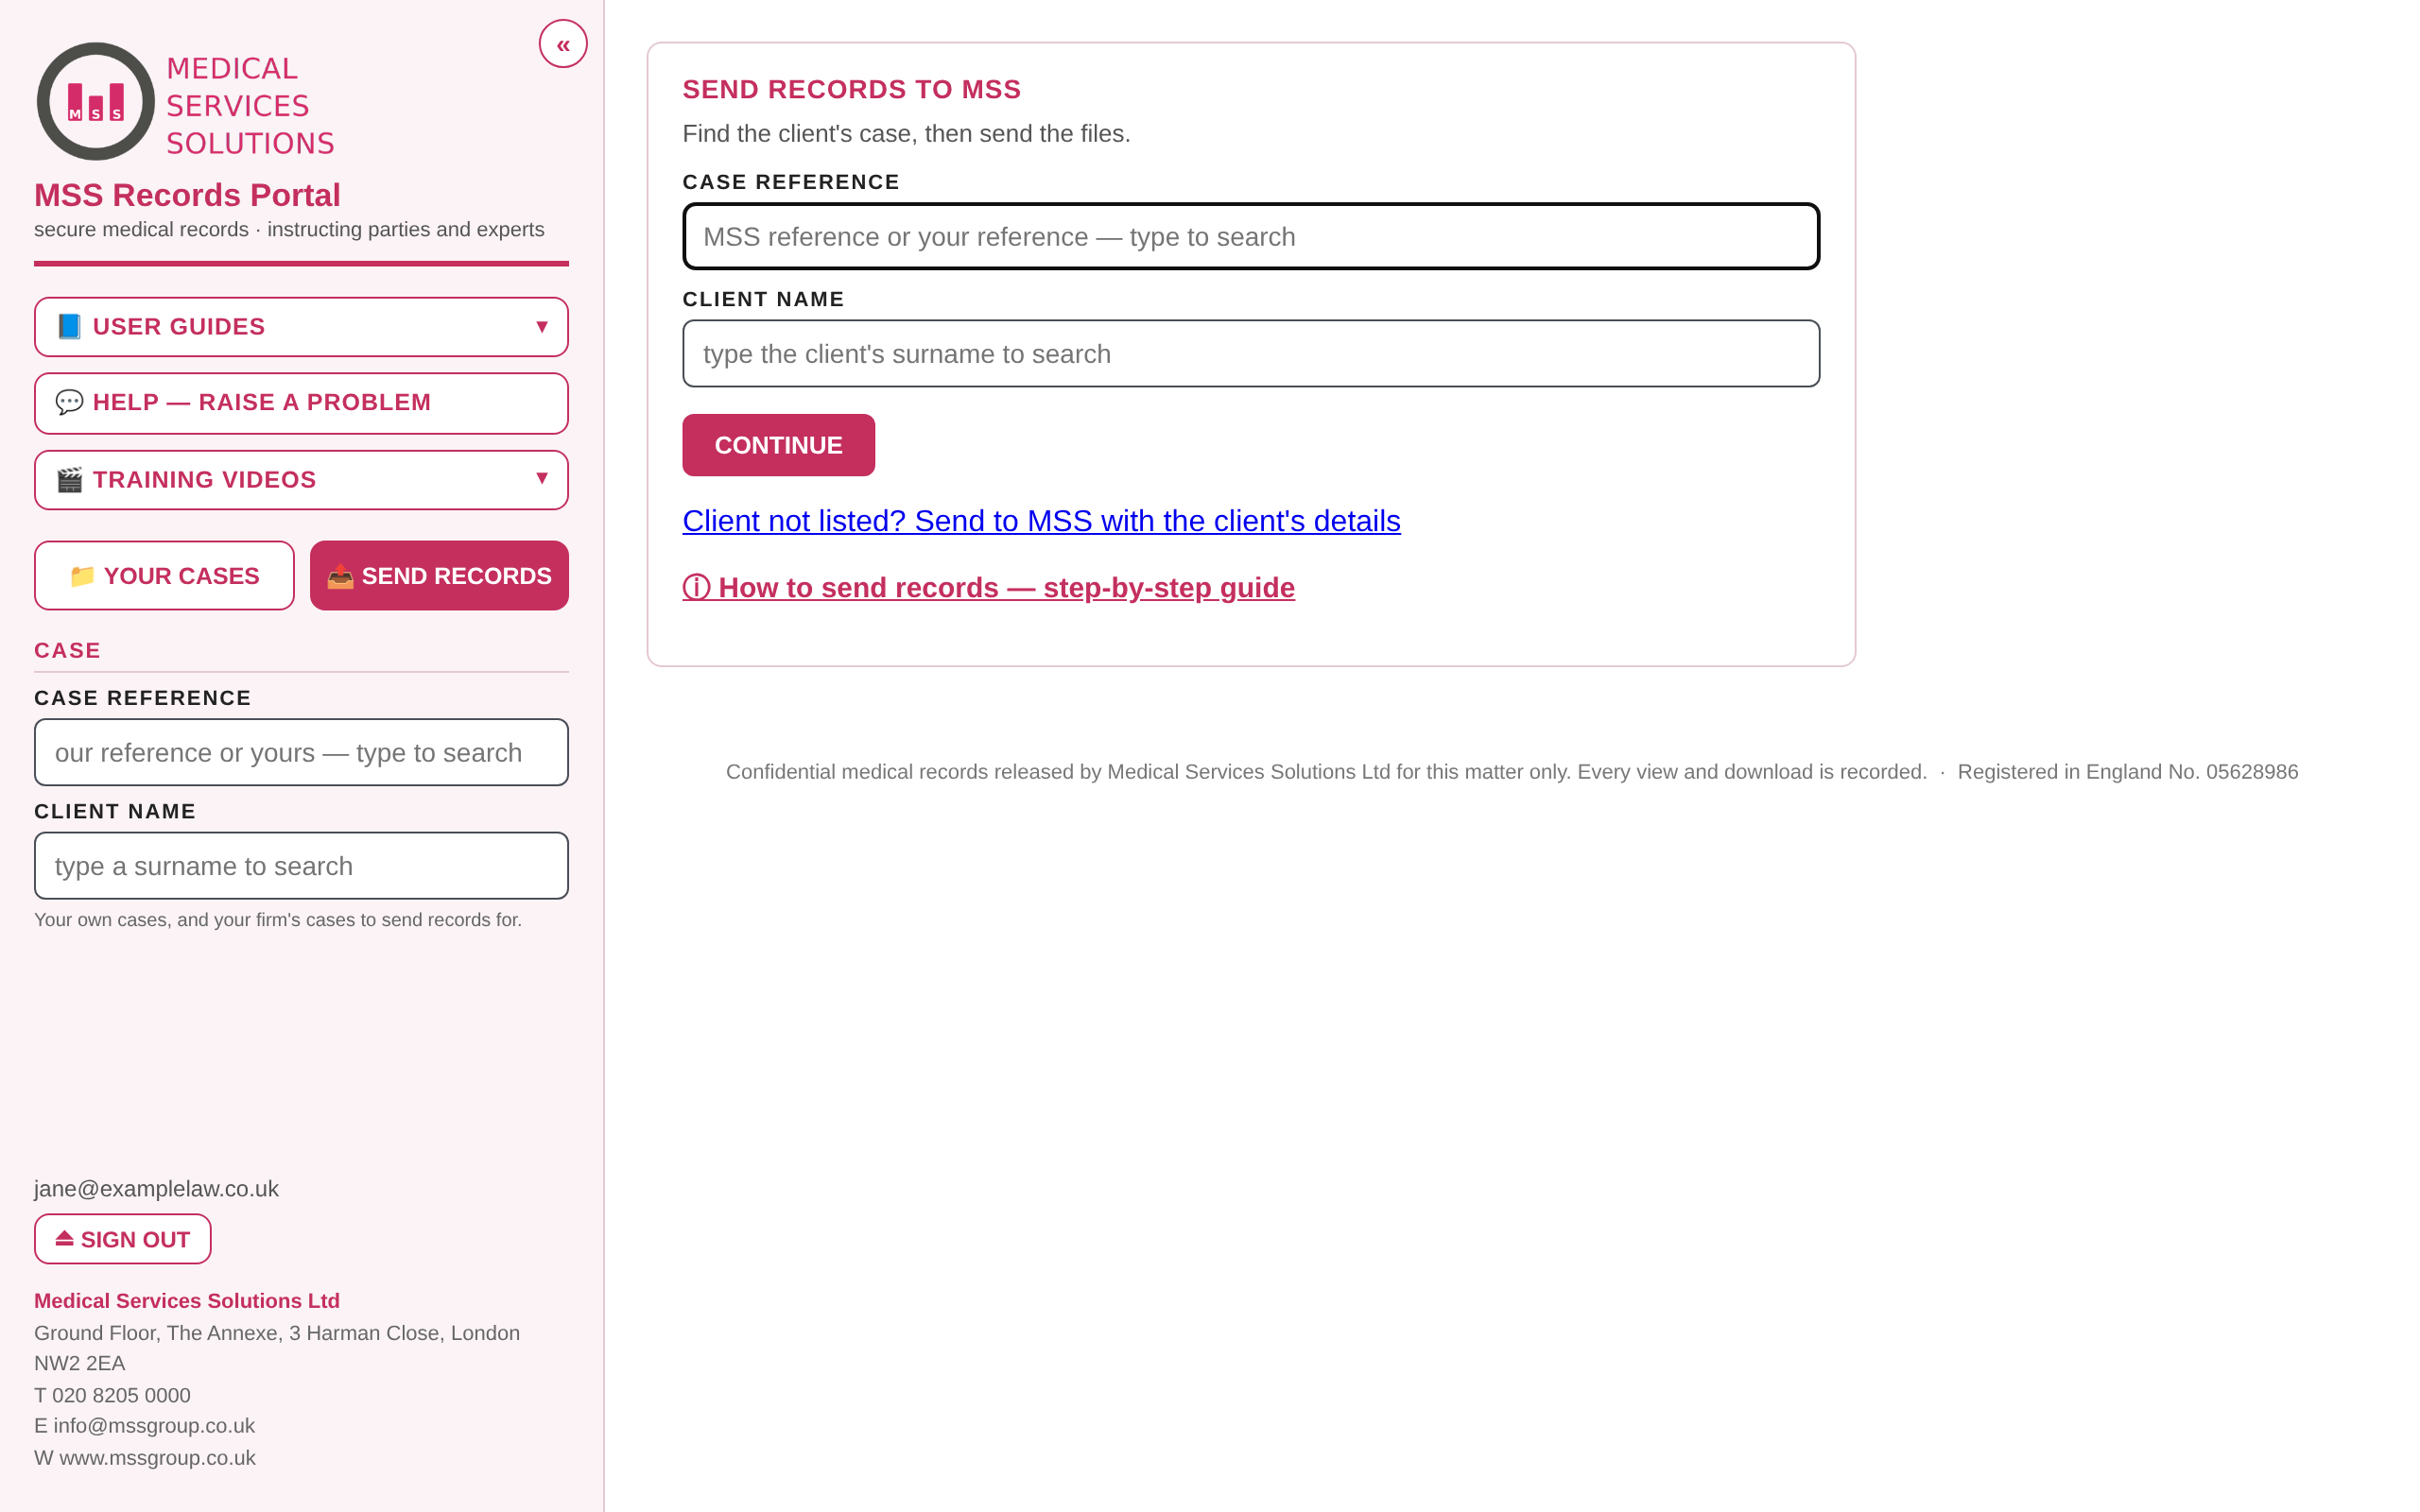
After signing in you arrive here. You can always get back to it with SEND RECORDS in the sidebar on the left. The sidebar also holds USER GUIDES, HELP — RAISE A PROBLEM and TRAINING VIDEOS.
5Find your client
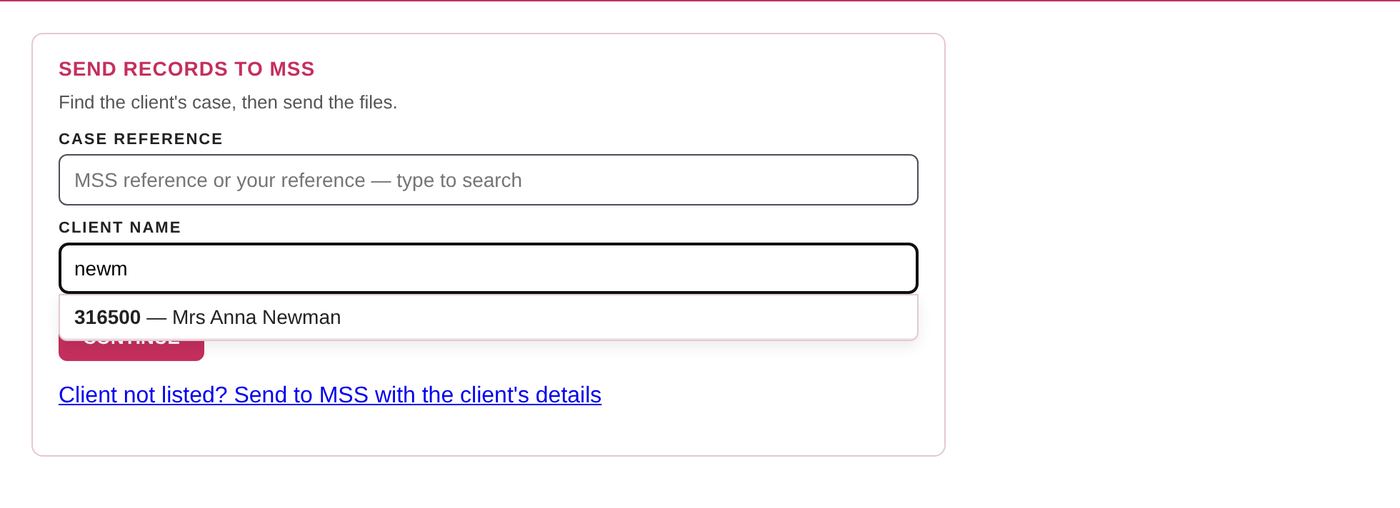
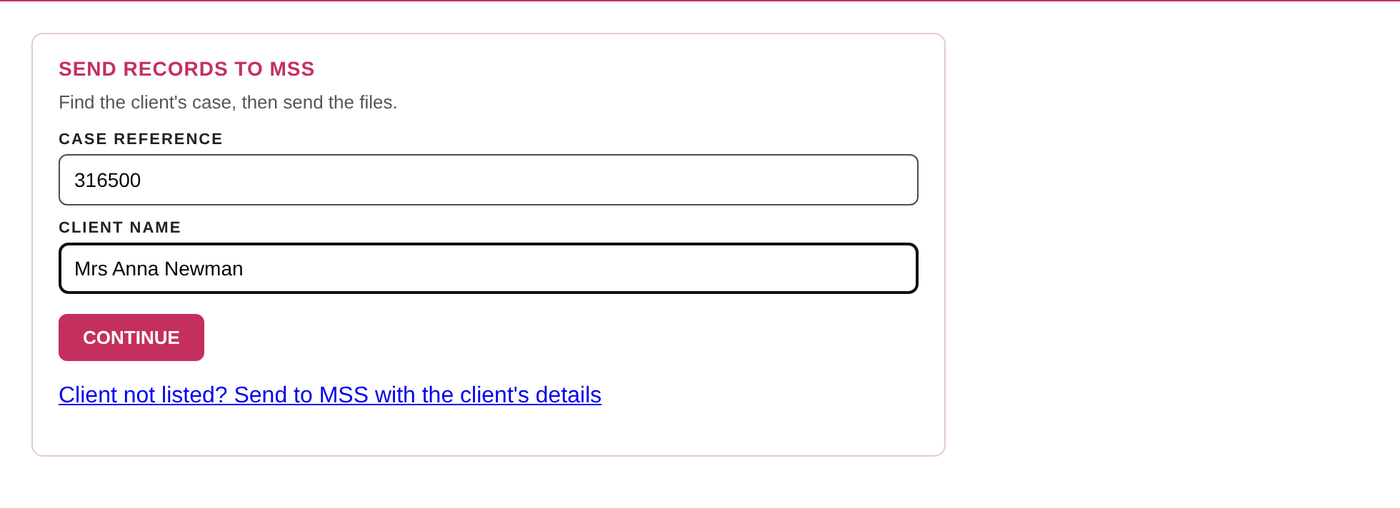
Type in CASE REFERENCE (the MSS reference or your own reference), or type the client's surname in CLIENT NAME. After two characters a list appears; click the right client.
You can also search from the sidebar's CASE boxes on any page: a case released to you shows OPEN, any other case of your firm shows SEND RECORDS and goes straight to step 7.
6Check and continue
Both boxes fill in. Check it is the right client and press CONTINUE.
7Add the records
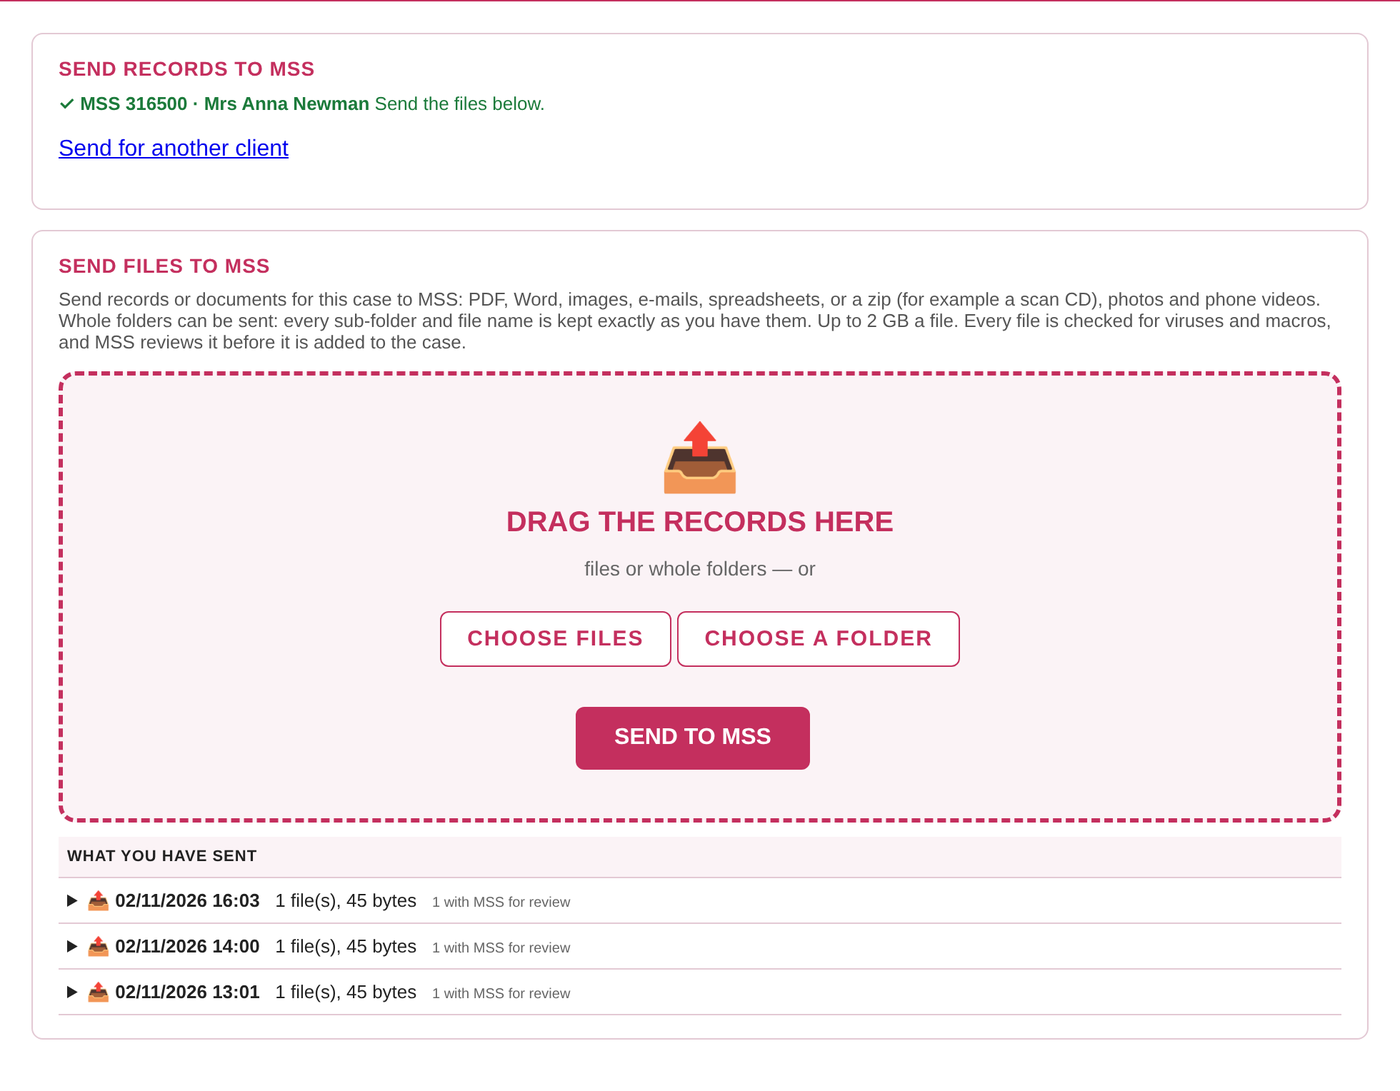
The client's name and MSS reference show at the top in green. Then either drag files or whole folders into the large pink box, or press CHOOSE FILES or CHOOSE A FOLDER.
PDF, Word, images, e-mails, spreadsheets, zips (for example a scan CD), photos and phone videos are all accepted, up to 2 GB a file. Folder and file names are kept exactly as you have them.
8Send
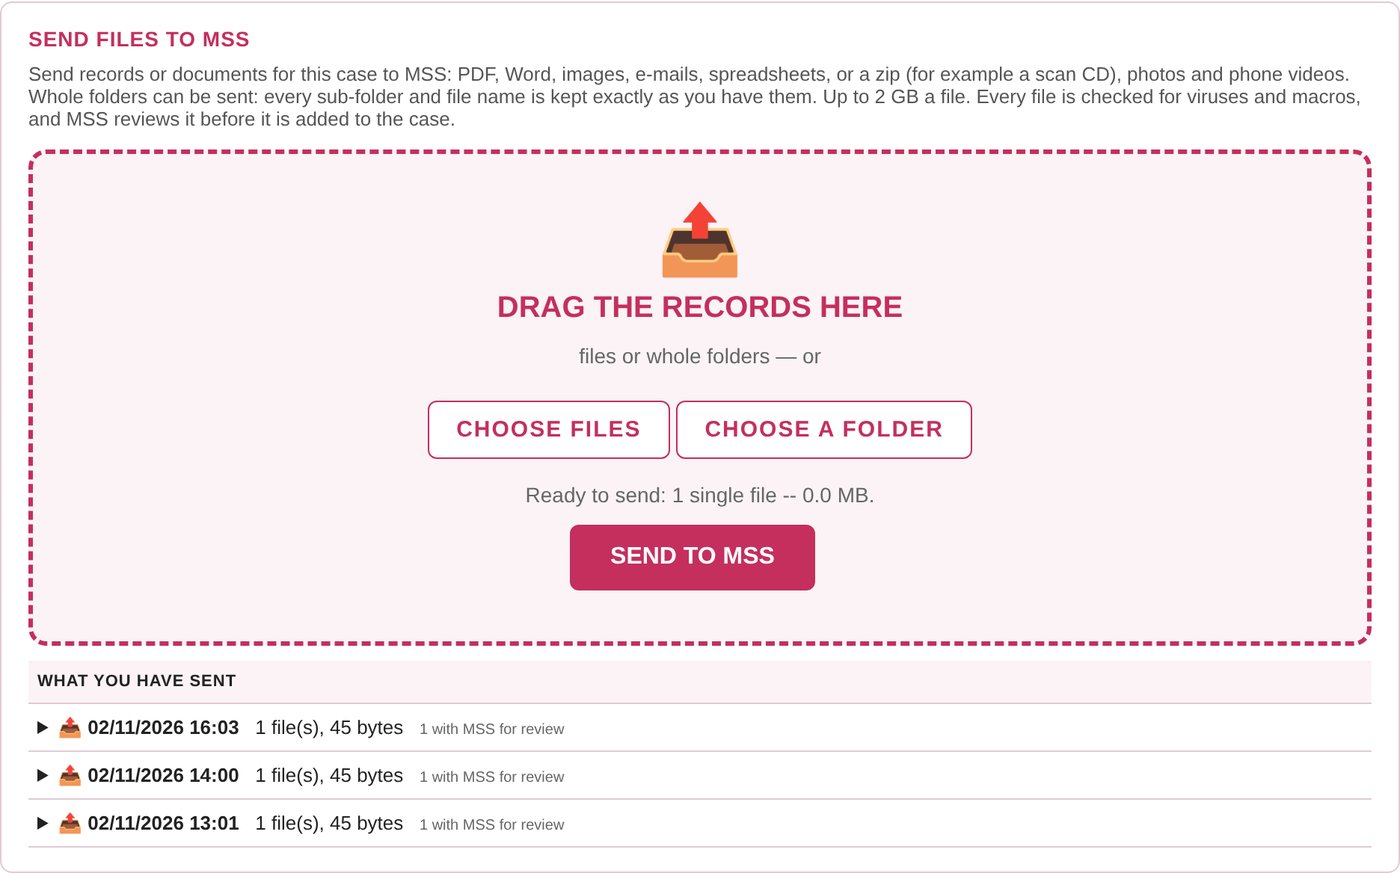
The box shows what is ready to send. Press SEND TO MSS and keep the page open until it finishes.
9Confirmation
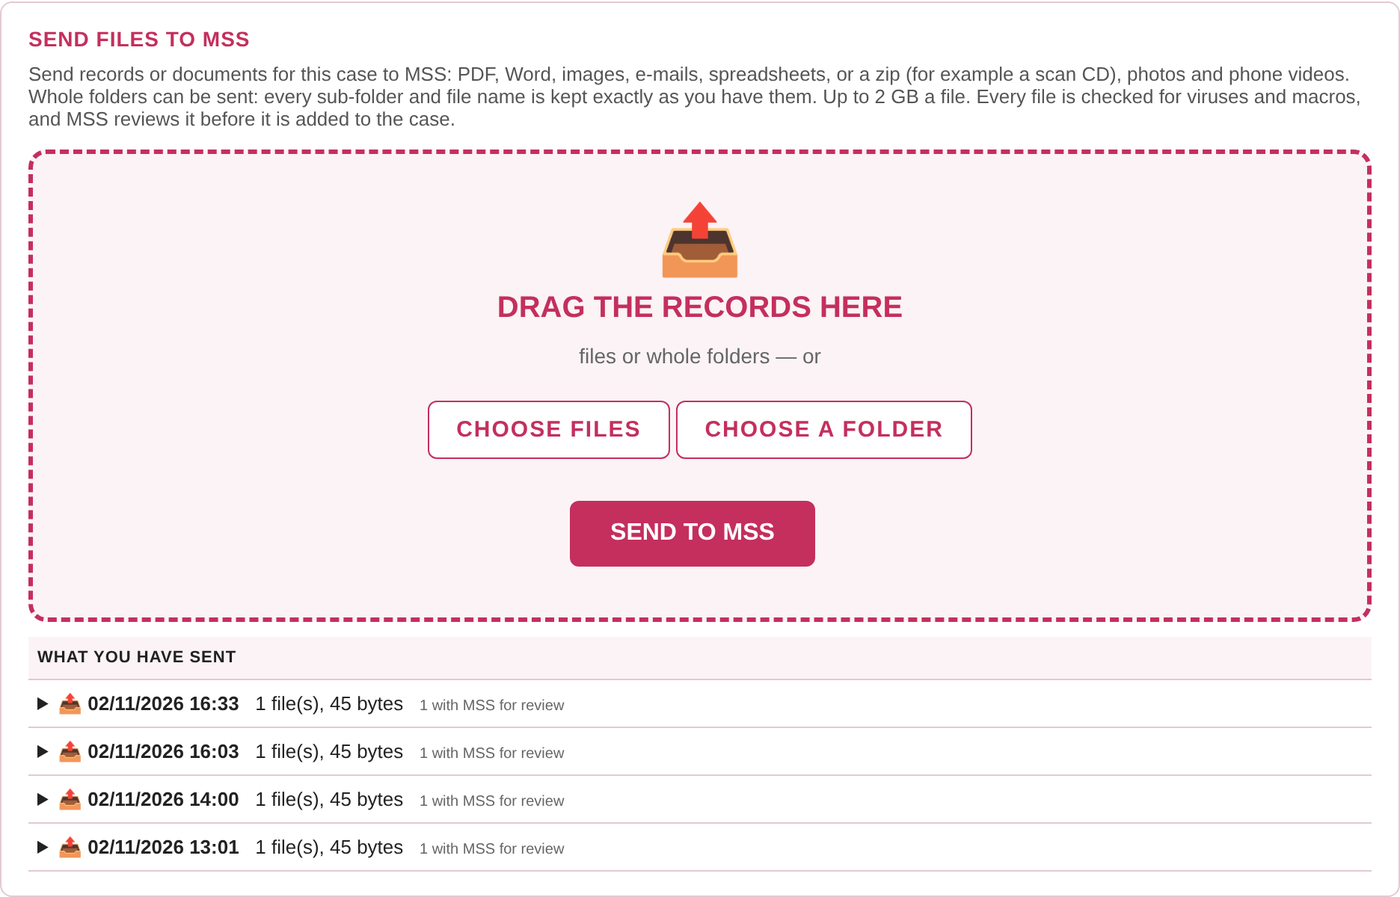
Your upload appears at the top of WHAT YOU HAVE SENT with the date and time. Click ▶ to see the files.
10Client not listed
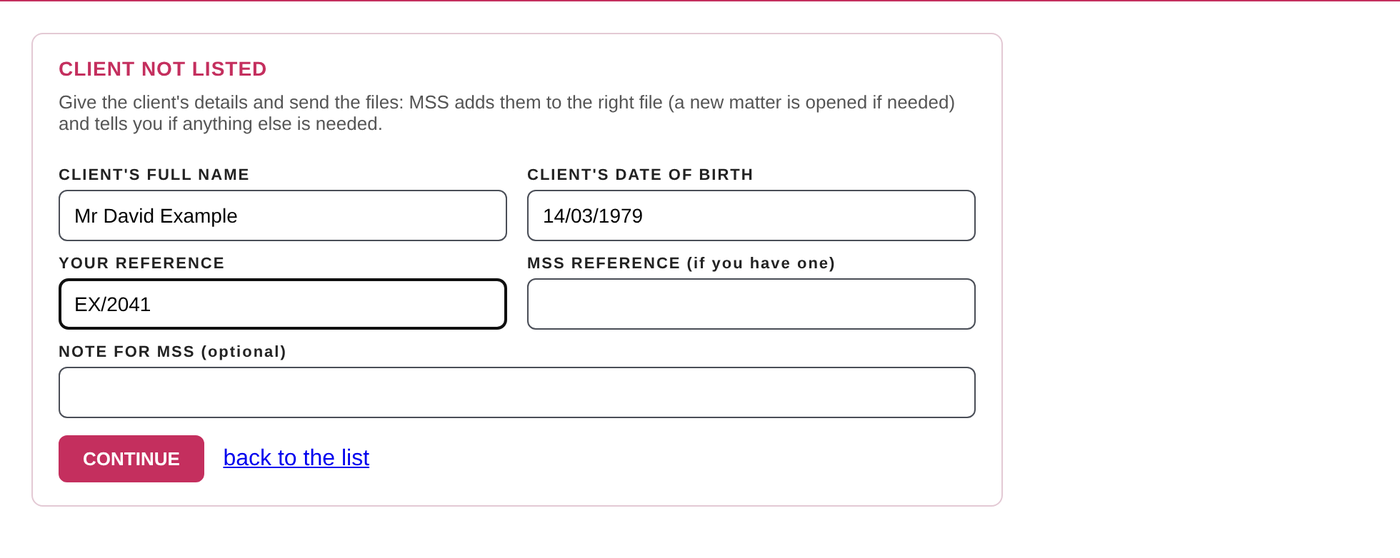
If you cannot find the client (for example a new instruction), click Client not listed? Send to MSS with the client's details. Give the client's full name, date of birth (the slashes are already in place: type the numbers only), your reference and the MSS reference if you have it. Press CONTINUE and send the files as in steps 7 to 9. MSS puts them on the right file.
11What happens next
- Every file is checked for viruses and macros.
- The MSS case handler is told straight away and reviews the files before adding them to the case.
| Status | Meaning |
|---|---|
| with MSS for review | Received; MSS has not reviewed it yet. |
| accepted | Added to the client's case. |
| not accepted | Not added (for example a duplicate or the wrong client). MSS will contact you if anything else is needed. |
12Help
Press HELP — RAISE A PROBLEM in the sidebar, say what happened and press GET HELP. Not solved? Press STILL STUCK — SEND TO MSS and MSS replies by e-mail. You can use it before signing in (give your e-mail address so MSS can reply).
Or call 020 8205 0000 or e-mail info@mssgroup.co.uk.